Over the edge: Hoisting from a better position
The one thing I always conclude whenever teaching and experimenting with hoists for improvised rescue is that they all suck. Z-pulley, 6:1, Spanish Burton, bla bla - all worthless. And think I am in venerable company when I make this claim. If you disagree, then you have never hoisted an incapacitated climber, heavier than thou, in complex terrain, over any distance. No Traxion allowed.
 |
| Friction ruins all the fun |
It is a natural fact that it is easier to work with gravity and friction rather than against them, meaning we should always try to go downhill. Or just stay put and slam the panic button. Still, there are times when we really need to get an injured or tired partner up, notably in environments like sea cliffs, canyons, crevasses, etc.
One big obstacle when hoisting, apart from that 110-kilo Godzilla at the other end, is the friction over the edge of the belay stance. This can be minimized if the anchor is built nice and high and the ledge is small. But on a big ledge and with a low anchor it needs to be managed. Another limiting factor is your strength. If you are just pulling the rope up with your hands, you can only achieve 150 to 400 Newtons of force. To make things worse, when pulling horizontally, you may not be able to get purchase with your feet and just slip.
The goal should always be to get the hoist in a position where the loaded rope does not have to travel over the edge, AND where we can use our own weight. Working with our weight is something we can do for hours if we have to, while pulling with our tiny fingers will leave us exhausted in minutes.
So we need to build a new, temporary master point below the ledge, and hoist from there.
A great way to do this is to use the rope you are tied in with, assuming you are clove hitched to the anchor with the climbing rope, and you are using a belay device in guide mode.
A great way to do this is to use the rope you are tied in with, assuming you are clove hitched to the anchor with the climbing rope, and you are using a belay device in guide mode.
 |
| Hoisting with a 2:1 from a new master point |
- First, tie a stopper on the passive end of the climbing rope to go hands-free. Do not tie off the device itself.
- Create room to manoeuvre. Give LOTS of slack in the rope you are tethered with. Make it a couple of meters beyond the edge. This is important. Better too much than too little.
- Now shorten that tether using a clove hitch, a rope clamp, a grigri, or any other method. This is now your adjustable tether, backed up by your original tie in.
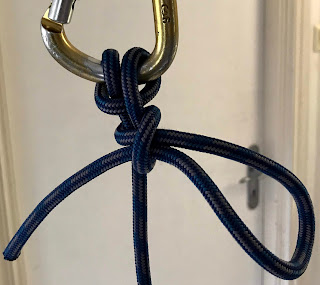
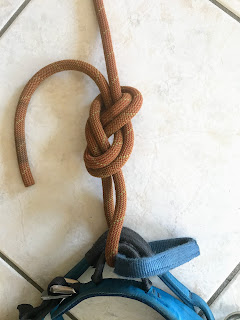
- Take the rope on the other side of your tie in at the anchor, pull out some slack, and make a second clove hitch (or figure 8) just over the edge. This is your new master point. (Check so that it is not going to get cut on anything sharp.)
- Make sure the passive end of the climbing rope can be reached from below the edge.
- Step over the edge, and adjust your tether so that you end up just below the new master point. With some luck, there are features for you to stand on.
- Build a redirected 2:1 hoist with a 180 cm or 240 cm slippery dyneema sling, redirected through the new master point and attached to your harness.
- Perform a "space haul", using your body weight to pull straight down.
- As you pull, capture the slack by pulling on the rope coming out of your belay device.
This is great because:
- you are getting rid of friction over the edge
- the 2:1 pulley system with a skinny Dyneema sling is lower friction than using rope
- you can work vertically, putting your full body weight into the work
- safe under stress: your belay device never leaves the rope, you never untie, no weird transitions involved
- only one prussik needed
- your tether and your new master point are both adjustable, so you can tweak your system as you go
Disadvantages
A potential problem is that if your original master point (where your belay device is) is far away, then as you pull up slack on the active side, the elasticity of the rope will mean that you lose some of the distance you have hauled. The shorter the distance to the belay device, the better. To solve this, you could use some other means of progress capture, such as an extra prussik, jumar or Traxion attached to the new master point.Also, the 2:1 described above does not provide a lot of mechanical advantage. You will be able to pull with just a little more than your bodyweight. If you are lightweight, but in good shape (strong legs), working upwards can sometimes be a better option. It also eliminates the redirecting carabiner which increases overall efficiency. Of course, this requires something to stand on.
Tip: with any hoisting system (2:1, 3:1 Z-pulley, 5:1, etc), to maximize your stroke, make sure to make your prusiks as short as you can. If the prussik is too long, shorten it with a suitable knot.
Tip: with any hoisting system (2:1, 3:1 Z-pulley, 5:1, etc), to maximize your stroke, make sure to make your prusiks as short as you can. If the prussik is too long, shorten it with a suitable knot.
Here are a few discussions and resources:

Comments
Post a Comment